Inilah Asal-Usul Tombol Qwerty

Inilah Asal-Usul Tombol Qwerty Setelah ane baca² artikel mengenai sejarah komputer ataupun laptop..jadi bertanya-tanya,kenapa susunan tombolnya kok qwerty,kok gak abcd sprt HP,jd gak perlu liat keypad/keyboard kita udah hafal sma susnan huruf pada keyboar..ternyata,ini sejarahnya..

Pernahkah kalian berfikir mengapa susunan keyboard yang sehari-hari yang umumnya kita gunakan dibuat dengan susunan yang seperti itu. Dan apakah menurut kamu apakah susunan yang seperti itu merupakan yang paling efisien yang pernah dibuat sehingga kita akan lebih mudah dan cepat untuk kita mengetik.

Begini, susunan keyboard yang dipakai umum sekarang ini (QWERTY) sebenarnya adalah salah satu susunan yang paling tidak efisien yang ditujukan agar kita-kita dapat mengetik dengan lebih lambat. Mengapa demikian? Ini dia sejarah susunan keyboard..
Hal ini berkaitan dengan sejarah mesin ketik yang ditemukan lebih dulu oleh Christopher Latham Sholes (1868). Saat menciptakan mesin ketik prototype sebelumnya, malah sangat memungkinkan kita untuk mengetik dengan lebih cepat.

Terlalu cepatnya kemungkinan dalam mengetik tersebut, sampai- sampai sering timbul masalah pada saat itu. Seringkali saat tombol ditekan, batang-batang huruf (slug) yang menghentak pita itu mengalami kegagalan mekanik, yang lebih sering diakibatkan karena batang-batang itu saling mengait (jamming).
Karena bingung memikirkan solusinya pada saat itu, Christopher Latham Sholes justru mengacak-acak urutan itu demikian rupa sampai ditemukan kombinasi yang dianggap paling sulit untuk digunakan dalam mengetik. Tujuannya jelas, untuk menghindari kesalahan-kesalahan mekanik yang sering terjadi sebelumnya.

Akhirnya susunan pada mesin ketik inilah yang diturunkan pada keyboard sebagai input komputer dan pada tahun 1973 diresmikan sebagai keyboard standar ISO (International Standar Organization).
Sebenarnya ada beberapa standar susunan keyboard yang dipakai sekarang ini. Sebut saja ASK (American Simplified Keyboard), umum disebut DVORAK yang ditemukan oleh Dr. August Dvorak sekitar tahun 1940.

Secara penelitian saat itu, susunan DVORAK memungkinkan kita untuk mengetik dengan lebih efisien. Tetapi mungkin karena terlambat, akhirnya DVORAK harus tunduk karena dominasi QWERTY yang sudah terjadi pada organisasi-organisasi dunia saat itu dan mereka tidak mau menanggung resiko rush apabila mengganti ke susunan keyboard DVORAK.

Satu-satunya pengakuan adalah datang dari ANSI (American National Standard Institute) yang menyetujui susunan keyboard Dvorak sebagai versi “alternatif” di sekitar Tahun 1970.
Susunan keyboard lainnya yang masih perkembangan dari susunan QWERTY adalah QWERTZ yang dipakai di negara seperti Hungaria, Jerman, Swiss, dll. AZERTY oleh negara Prancis dan Belgia, QZERTY, dll.


Sumber

How to get set up for mapping for Urban Terror 4.1 with GtkRadiant 1.5

I believe this forum is missing a straight forward simple guide on how to get started mapping for Urban Terror with GtkRadiant, so here is my attempt at a beginner's guide.


How to get set up for mapping for Urban Terror 4.1 with GtkRadiant 1.5

All the files you will need:
- UrT Shaderlist
- UrT Entity Definitions
- GtkRadiant (map editor) (from http://www.qeradiant.com/ ) Mirror
- q3map2 (map compiler)
- q3map2toolz (compiler front-end)
(I also link to these files throughout the guide, so don't get confused and download them twice.)


*note: While reading this guide, you will see drive letters and paths that may be a bit different on my computer than on yours, so follow along by substituting in your own. Also, this is a guide for Windows XP users (not 64 bit).


Step 1. Make a whole copy of your UrT folder
Instead of cluttering up your install of UrT that you use to actually play the game, it is better to make a copy of it and then clutter that one up with your map development. (This isn't necessary however, you could just map on your existing UrT installation.)

So, make a new folder like "d:gamesurt41mapping" (or whatever you want to call it, but I recommend no spaces in the names), and copy your entire UrT 4.1 there.

OR

You could just install a fresh new copy of UrT to this new mapping folder.


Step 2. Clean up your copy of UrT
If you copied your UrT instead of doing a fresh install, then you should clean up the mapping copy by deleting extra 3rd party maps or other junk so that it is a reasonably clean install - but don't delete anything if you're not sure what it is. But if you did a new clean install of UrT, then ignore Step 2.


Step 3. Using winzip, extract zpak000.pk3 and zpak000_assets.pk3


Step 4. Clean up maps
Go to D:gamesurt41mappingq3ut4maps and delete all the files in there, because we didn't really need to extract them and they just clutter it up.


Step 5. Copy shaderlist.txt to your scripts folder. (download here: shaderlist.zip)


Step 6. Copy urbanterror.def to your scripts folder. (download here: urbanterrordef.zip)

*** Actually I think it has to go here: C:\Program Files\GtkRadiant 1.5.0\q3.game\baseq3\ (but there may be other errors in this tutorial regarding this...)


Step 7. Download GtkRadiant 1.5
GtkRadiant (map editor) (from http://www.qeradiant.com/ ) Mirror


Step 8. Install GtkRadiant and configure it:
- choose Quake III Arena as the game
- then in Edit Preferences, change Path to D:/games/urt41mapping/
- in project settings choose a custom modification and set the fs_game to q3ut4.


Step 9. Download the q3map2 compiler
- extract it to D:/games/urt41mapping/


Step 10. Download Q3map2Toolz and install it.


Step 11. Set up Q3Map2Toolz for UrT:
First, run the configuration tool
- for long name of the game, type in Urban Terror
- for short name, type in urt
- set the base folder to baseq3 ( This will cause q3map2toolz to complain about not finding a baseq3 folder. Ignore this message; its important that this is not q3ut4, strange but true. )
- set name of game exe to ioUrbanTerror.exe
- Click ADD
- Click Close

Second, run Q3Map2Toolz, and the preferences will come up right away:
- choose game Urban Terror
- set path to ioUrbanTerror.exe, in my case D:gamesurt41mappingioUrbanTerror.exe
- set path to q3map, D:gamesurt41mappingq3map_2.5.16_win32_x86q3map2.exe
- set path to bspc.exe, C:Program FilesGtkRadiant 1.5.0bspc.exe
- Click OK
(You will get an error about urt.dat not existing, but a generic dat file is created under that name for you. This is fine.)
- Exit out of Q3Map2Toolz


Step 12. Create your "my first map"
Create your "my first map" - a hollow box with a player spawn and a light in it.
(See other tutorials here: http://forums.urbant...opic,757.0.html  on how to do this if you don't know how - it is outside the scope of this guide.)
- Save the map (in my case box.map)
- exit gtk radiant


Step 13. Compile the map with Q3Map2Toolz:
- Open Q3Map2Toolz
- Click on the name of your map (in my case box.map)
- Choose BSP Vis -fast Light
- Just to the left of the 'Add' button theres a check box labeled '-fs_basepath', tick it. (Leaving it off can cause problems, like textures being scaled incorrectly)
- Click the Build button (a dos window will flash up and go away, this is normal ,it's the compiler compiling the map)

Now when you look in D:gamesurt41mappingq3ut4maps you will see box.bsp which is the compiled map.

Then back in Q3Map2Toolz, change the dropdown box to list bsp files instead of map files, then click on box.bsp, and then click the DevMap button to launch urbanterror (it will automatically launch your map in UrT). Run around your map and admire the 4 walls.

Now you can keep editing and working on your map in GtkRadiant, and basically repeating Step 13 to compile your map every time you want to test out your changes inside UrT.


Step 14. Package your map
When your map is done (or it's done to a point that you want to test it with some other people), you'll need to package it in a pk3. In the case of a simple test map (like my box map) where you are using only base urt textures and none of your own texture or sounds or anything, packaging it is a simple thing.

My lazy man's way of doing it is this:
- go to D:gamesurt41mappingq3ut4
- assuming you have winzip installed, and assuming that you don't have a million files in your maps folder, right click on the maps folder and click Winzip - Add to maps.zip
- now in D:gamesurt41mappingq3ut4 you will see a file called maps.zip. Rename it to box.pk3
- open box.pk3 in winzip and delete all the files in there except box.bsp

Now you've got your pk3 file, so you should copy and paste it to your regular urbanterror q3ut4 folder (the one you use for playing urt on, not the one we've been using for mapping).


Now you're done! You can send the pk3 around to your friends or for testing on a server.

Of course packaging a real map that isn't just a simple box with default textures is more involved than this, but there are already tutorials about that.

I hope someone finds this guide helpful.


Also, if any of you mapping experts out there notice any errors or problems with this guide, please let me know so I can fix it.

Lucid Puppy 5.2.5 is Released

Download version 5.2.5 from ibiblio.org: Get lupu-525.iso or explore the folder.
Download version 5.2.5 from nluug.nl: Get lupu-525.iso or explore the folder.
MD5 Checksum: b6658ab75cd5d48f358f0ee31b06b934
ISO Size: 128MB

desktop image of lupu 525
Lucid Puppy 5.2.5 desktop with first-run and browser wizards.

New in Lucid Puppy 5.2.5 (released April 2, 2011):

  • Bash 4.1.0, Syslinux 4.03, e2fsprogs 1.41.14, JWM 500, Gnumeric 1.10.13;
  • updated PBurn and Gnome-MPlayer 1.02;
  • built from Woof of February 26, 2011.

Lucid Puppy 5.2 (released January 5, 2011):

  • is still compatible with Ubuntu packages;
  • has QuickSet for point-and-click desktop configuration;
  • has QuickPet for updates, diagnostics, and package installs;
  • has alternative window managers (XFCE, Fluxbox) through the package manager;
  • includes language packs for 11 different languages;
  • a true Puppy Linux built using Woof, the magical build script of Chief Developer Barry Kauler.

Announcement and Release Notes

Forum discussion

Tips and Tricks

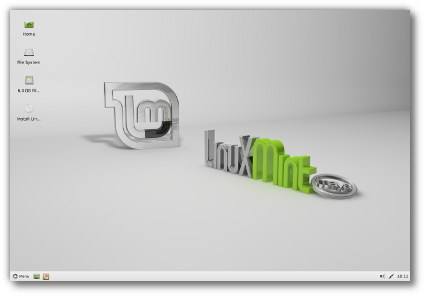
Linux Mint 13 “Maya” Xfce RC released!

The team is proud to announce the release of Linux Mint 13 Xfce RC.


Linux Mint 13 Xfce

New features at a glance:

For a complete overview and to see screenshots of the new features, visit: “What’s new in Linux Mint 13 Xfce“.

Important info:

  • mintMenu in Xfce
  • Xfwm margins
  • Xfce trash in live mode
  • Boot hangs on systems with b43 wireless cards
  • Moonlight

Make sure to read the “Release Notes” to be aware of important info or known issues related to this release.

System requirements:

  • x86 processor (for both 32 & 64-bit versions)
  • x86_64 compatible processor (for the 64-bit version)
  • 384 MB of system memory (RAM)
  • 5 GB of disk space for installation
  • Graphics card capable of 800×600 resolution
  • CD-ROM drive or USB port

Download:

Md5 sum:

  • 32-bit: e837b79e7f6c2550fd4d74c7d241b2d0
  • 64-bit: 2789901ecc92e03cf2bfc974a68ce978

Torrents:

HTTP Mirrors for the 32-bit DVD ISO:

HTTP Mirrors for the 64-bit DVD ISO:

Sumber : Linux-Mint

Facebook Luncurkan Fitur Anti Malware

Facebook MalwareFB serius untuk memerangi malware yang semakin menggila mengintai pengguna. Hari ini, Selasa (11/07/12) waktu setempat, Facebook meluncurkan sebuah fitur ‘anti’ Malware dengan menggandeng McAfee dan Microsoft.

Dikutip dari AllFacebook, fitur ini nantinya akan berupa sebuah ‘pos pemeriksaan’ khusus yang bakal memindai sistem penguna untuk membersihkan dari ancaman malware dengan menggunakan Scan dan Repair dari McAfee serta Security Essentials dari Microsoft.

Apakah layanan tersebut bisa digunakan secara cuma-cuma? Tentu saja gratis. Jika tidak gretongan bukan Facebook namanya. Anda bisa mengunjungi laman ini untuk memindai dengan Scan dan Repair dari McAfee atau klik di sini untuk Security Essentials dari Microsoft.

“Selama beberapa tahun terakhir, kami telah mengembangkan sistem dalam kampanye proaktif kami dalam mengidentifikasi konten berbahaya yang diposting di Facebook. Setelah proses identifikasi tersebut, kami membantu pengguna dengan menyediakan produk antivirus gratis,” tulis Facebook dalam sebuah catatan.

Facebook kemudian melanjutkan, McAfee nantinya tidak akan crash dengan produk antivirus yang sebelumnya telah ‘tertanam’ atau telah digunakan. Setelah proses pemindaian selesai, Anda diberi pilihan untuk men-delete secara manual atau otomatis.

Dan Microsoft Security Essentials sendiri adalah sebuah produk antivirus unggulan dari Microsoft. Pengguna sistem operasi Windows sendiri sejatinya bisa mendapatkan antivirus ini secara cuma-cuma di Windows Update.

Apakah Anda salah satu korban malware di Facebook? Segera gunakan tool cuma-cuma ini di laman berikut untuk McAfee Scan and Repair atau di sini untuk Microsoft Security Essentials.

Tutorial Root Android 3.1 (Galaxy Tab 10.1 16GB Wifi 3G)

Tampaknya sebelum menyelesaikan tutorial install backtrack di Galaxy Tab sebaiknya ane berbagi dulu gmn cara nge-rootnya Big Grin

Ini semua berawal ketika tiba2 kantor membeli gadget baru mulai dari iPad 2, Galaxy Tab, Blackbery Torch n iMac Mini. Alasan membeli gadget ini karena para petinggi dan mayoritas pegawai di kantor sudah memiliki minimal salah satu gadget2 sexy tersebut. Untuk pertama kali ane coba pastinya iPad 2 Big Grin

Trus googling2 ternyata Jailbreak buat iPad 2 belum tersedia karena para pembuat exploit masih belum bisa mengakalin cara kerja processor terbarunya beatpc

Lanjut ke Galaxy Tab, ternyata android satu ini lebih mudah utk dioprek karena tutorialnya banyak sekali, bahkan bisa untuk menjalankan OS BT5 secara lancar Angry

Spesifikasi Galaxy Tab yg digunakan:
Body Dimensions 256.7 x 175.3 x 8.6 mm
Weight 565 g
Display Type PLS TFT capacitive touchscreen, 16M colors
Size 800 x 1280 pixels, 10.1 inches (~149 ppi pixel density)
Internal 16 GB storage, 1GB RAM
Data GPRS Yes EDGE Yes
Speed HSDPA, 21 Mbps; HSUPA
WLAN Wi-Fi 802.11 a/b/g/n, Wi-Fi Direct, dual-band, Wi-Fi hotspot
Bluetooth Yes, v3.0 with A2DP
Features OS Android OS, v3.1 (Honeycomb)
Chipset Nvidia Tegra 2 T20
CPU Dual-core 1 GHz Cortex-A9
GPU ULP GeForce

Kenapa harus di-root??
Jawabannya karena banyak aplikasi di android market terutama yg memaksimalkan kinerja wifi hanya dapat berjalan jika udah di-root, bisa dioverclock sampe 2 GHz (tapi abis itu ga bisa dipake kali ya? :hammer) selain itu kita bisa juga install ubuntu atau BT5 di Android...

Keren kan? lanjuuut....Confused

Apa saja yg diperlukan??
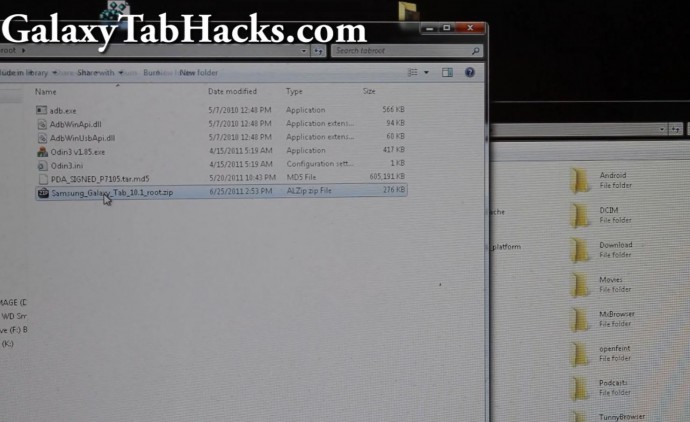
  1. GT-p7510_USB_Driver_v1_3_2360_0-Escape.exe --> USB Driver Galaxy Tab buat di OS Windows
  2. Odin3_v1.85.exe --> tools utk melakukan flashing di Android devices
  3. recovery-cwm_4.0.0.4-sam-tab-10.1.tar.md5 --> file flashnya
  4. Samsung_Galaxy_Tab_10.1_root.zip --> file utk nge-root


File-file diatas bisa didownload disini

Setelah itu ekstrak ke folder yang diinginkan

Oiya sampai sini ane mau bilang klo proses root android lebih mudah dilakukan di OS Windows karena memang toolsnya banyak, kalau teman2 bisa melakukannya di Linux juga tidak masalah kok, tapi ane pilih Windows biar lebih mudah.

Langkah-Langkahnya:
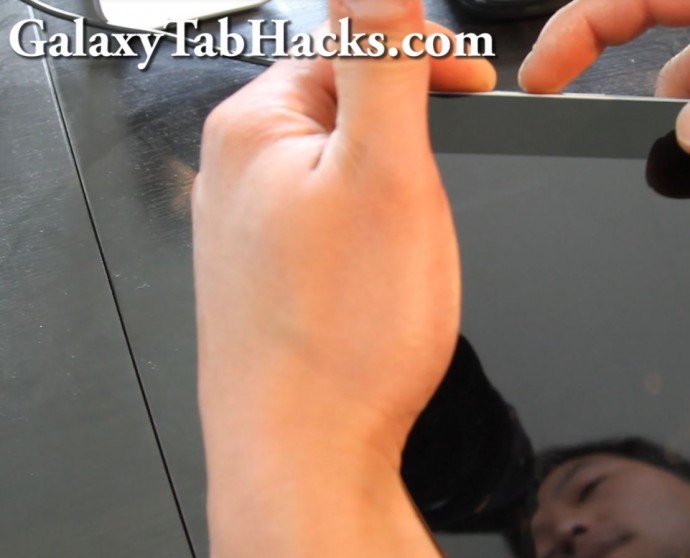
1. Matikan Galaxy Tab dulu dengan menekan tombol power kemudian pilih power off
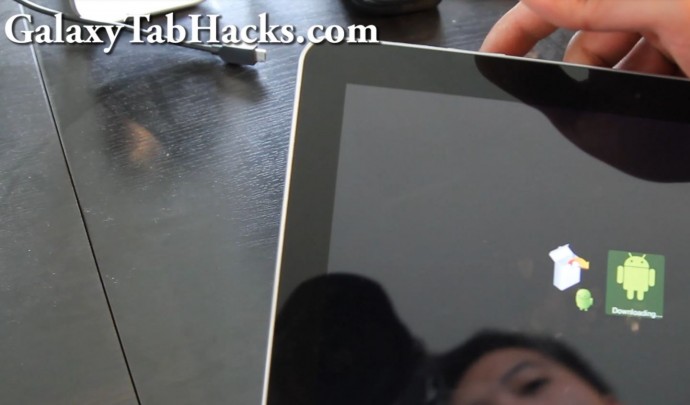
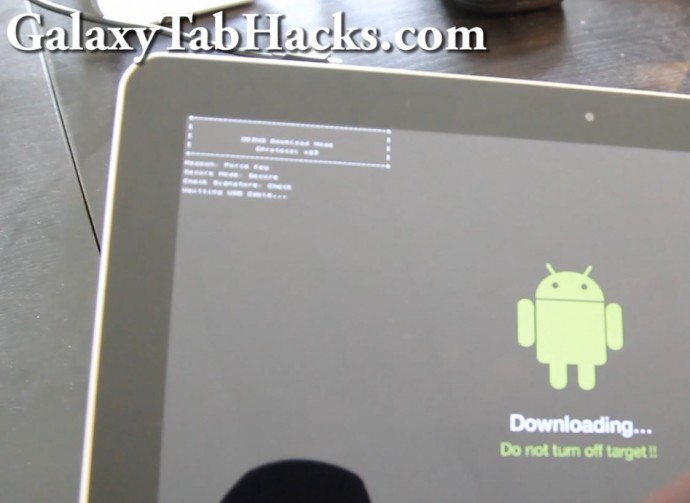
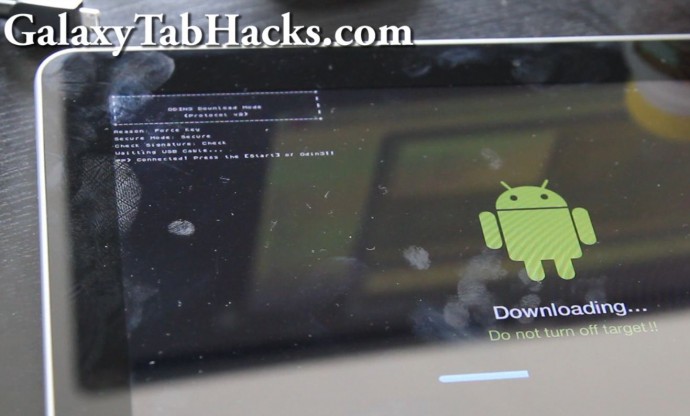
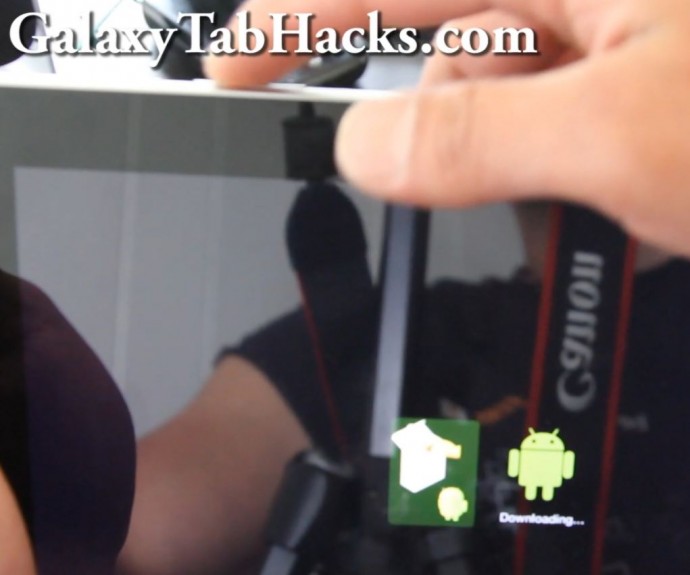
2. Masuk ke dalam Mode Downloader, tekan tombol volume down + power secara bersamaan kemudian lepas ketika ada gambar dua (2) buah icon berbentuk android besar dan android kecil (+ kotak).

note: tombol volume down adalah yg paling dekat dengan tombol power


pilih Android besar untuk masuk ke Mode Downloader dengan menekan tombol volume up


3. Sebelum memasang kabel USB ke PC/Laptop install dulu drivernya dari file yang telah di download diatas, dobel klik GT-p7510_USB_Driver_v1_3_2360_0-Escape.exe kemudian next, next .....
setelah selesai install driver baru kita pasang kabel USBnya ke PC/Laptop dan biarkan Windows mengenalinya.

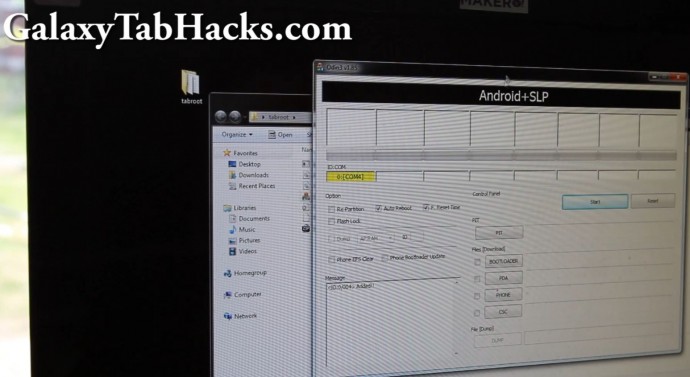
4. Jalankan Odin3_v1.85.exe, perhatikan pada kotak kiri atas seharusnya Galaxy Tab telah terdeteksi dengan adanya tulisan COM: X warna kuning (X bisa angka berapa saja).


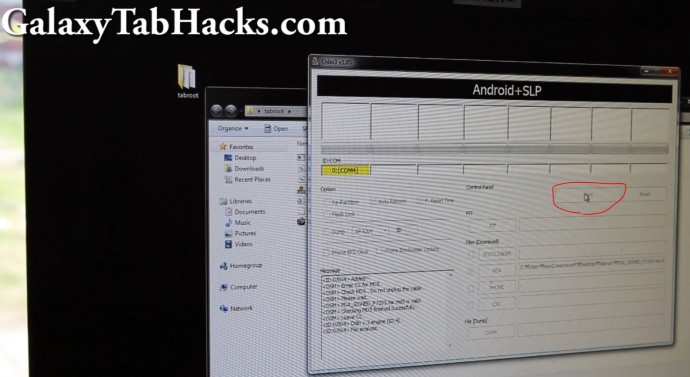
Pilih yang PDA kemudian cari file recovery-cwm_4.0.0.4-sam-tab-10.1.tar.md5 setelah itu klik start...


kemudian Galaxy Tab akan mulai melakukan proses flashingnya...


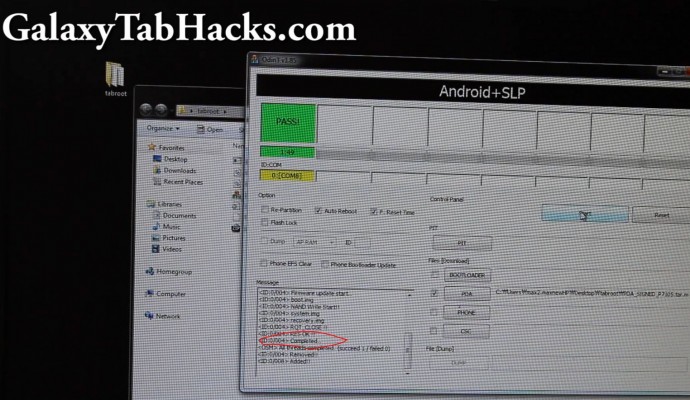
Ketika selesai Galaxy Tab akan reboot dengan sendirinya.

5. Copy file Samsung_Galaxy_Tab_10.1_root.zip ke Galaxy Tab, gunakan saja Windows Explorer tinggal drag n drop. Taruh di folder paling luar dari Galaxy Tab biar mudah dicari nantinya.


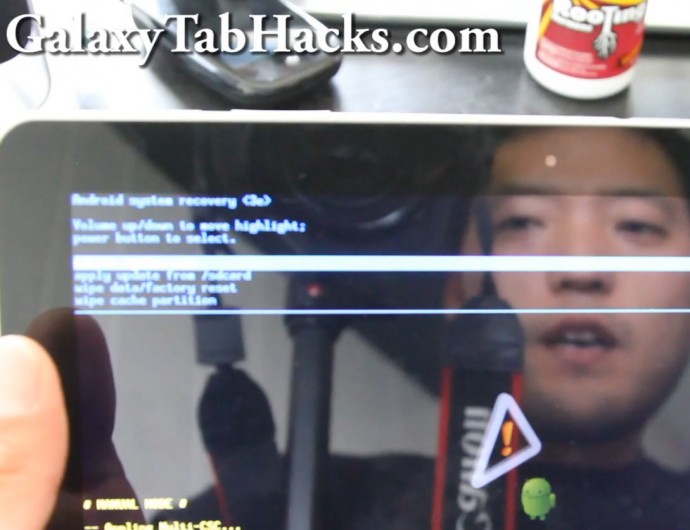
6. Matikan Galaxy Tab dan lakukan hal seperti pada langkah no 2 tetapi kali ini pilih Android kecil (+kotak)


7. Tekan tombol volume up/down untuk memilih “apply update from /sdcard”, next tekan tombol power.


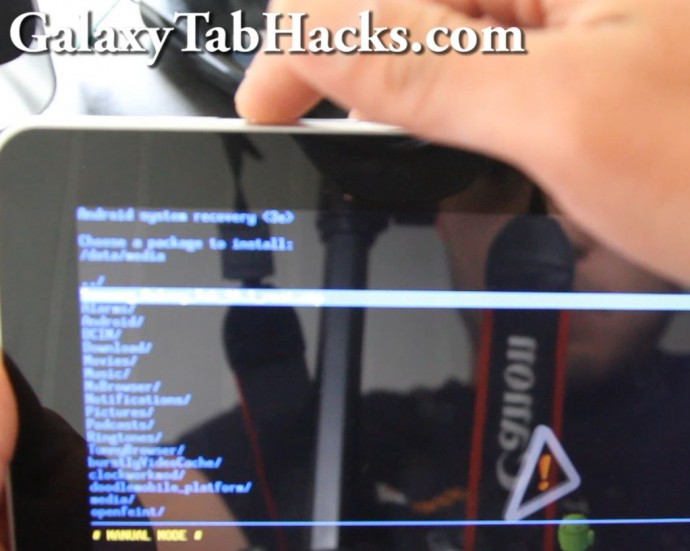
8. Cari file Samsung_Galaxy_Tab_10.1_root.zip kemudian tekan tombol power.


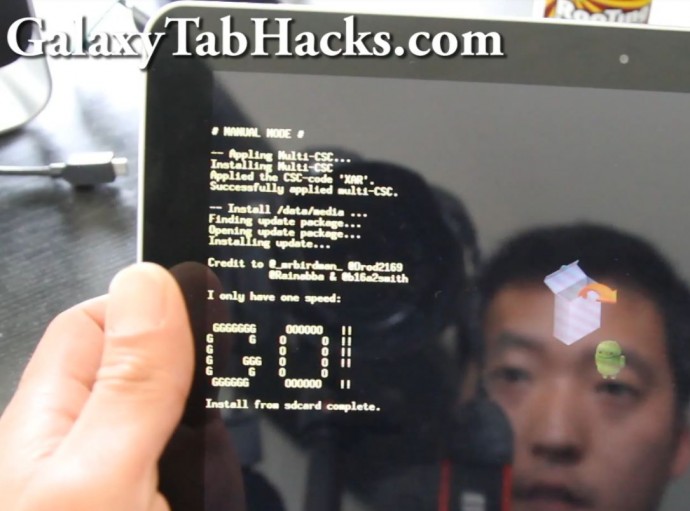
Galaxy Tab akan melakukan proses root sampai selesai....


Jika semuanya lancar seharusnya muncul "Install from sdcard complete"

9. Pilih "Go back" kemudian pilih reboot

VOILA !! Galaxy Tab telah di-root
forgiveness


Berikut adalah tutorial videonya:
Spoiler! :


Semoga bermanfaat
iKONs


Note:
Maaf gambar hasil copas dari web sumbernya


Sumber:
http://galaxytabhacks.com/galaxy-tab-10-...-tab-10-1/
http://forum.xda-developers.com/showthre...?t=1239185

Install Backtrack 5 di Galaxy Tab 10.1 16GB Wifi 3G

Melihat judulnya pasti pada tertarik ya? ^_^"0">

Langsung saja....

Resep yg dibutuhkan?
  1. Otak yang bersih
  2. Galaxy Tab yang udah di-root bisa dilihat disini
  3. Backtrack 5 ARM bisa di download disini
  4. Busybox dari Android Market
  5. Superuser dari Android Market
  6. Terminal Emulator dari Android Market
  7. AndroidVNC dari Android Market
  8. Ingat! There is no secret Ingredients ^_^"0">


Saat ini Backtrack-Linux.org hanya membuat Backtrack versi 5 utk device dengan processor ARM yang R1 belum ada (mungkin bisa diupdate? besok mau dicoba lagi dikantor Big Grin)

Langkah-Langkahnya:
1. Galaxy Tab 10.1 yang telah di-root pastinya
2. Ekstrak file BT5-GNOME-ARM.7z sehingga di dalamnya akan ada file:
  • bootbt
  • fsrw
  • README
  • bt5.img.gz
  • installbusybox.sh
  • unionfs
  • busybox
  • mountonly

Untuk file bt5.img.gz kalo bisa di ekstrak dulu di pc karena klo di ekstrak di Galaxy Tab akan memakan waktu yang cukup lama, caranya di linux/BT5:
Code:
gunzip bt5.img.gz
bisa juga dengan menggunakan 7zip atau winrar.

3. Taruh file hasil ekstrak diatas ke Galaxy Tab dengan nama folder BT5 (ditaruh di bagian paling luar/root)

Spoiler! :
[Image: 35bytkn.png]

4. Buka Terminal Emulator

Spoiler! :
[Image: 28khbhz.jpg]

Spoiler! :
[Image: oa3daq.jpg]

setelah masuk di terminal naik angkot M01 jurusan Kp. Melayu - Senen, disana beli teh botol udah seger balik lagi kesini ^_^"0">

dah seger?
command yang digunakan di Android sama seperti di Linux seperti ls utk view file, rm utk menghapus, cp utk mengkopi dll

contoh untuk masuk ke folder BT5 yang telah dikopi via Windows Explorer di langkah 3...

ketik ls untuk mencari folder sdcard

Spoiler! :
[Image: fp08wj.jpg]

masuk ke folder sdcard kemudian folder BT5 (ingat harus case sensitive)

Spoiler! :
[Image: 24cbe6o.jpg]

lihat isi folder BT5, kemudian lakukan hal berikut:
Code:
su
sh bootbt

Spoiler! :
[Image: k02exy.jpg]

Setelah melakukan sh bootbt kita akan mendapatkan root@localhost:

pastikan isi didalam shell tersebut, contoh ls /pentest

Spoiler! :
[Image: 15mlele.jpg]

5. Jalankan VNC
Code:
startvnc

kemudian cari port dimana VNC melakukan listening (LISTEN) dengan cara:
Code:
netstat -anpt

catat port-nya (pada contoh gambar dibawah ada di port 5901)

Spoiler! :
[Image: azjva8.jpg]

6. kembali ke Home, buka AndroidVNC

Spoiler! :
[Image: 2h4w4d5.jpg]

setting pada AndroidVNC:
  • Nickname: Terserah suka-suka
  • Password: toortoor
  • Address: 127.0.0.1 --> localhost
  • Port: 5901 --> seperti pada contoh gambar diatas (tiap PC/Laptop kemungkinan berbeda
  • Username: kosong
  • Color Format: 24 bit

Spoiler! :
[Image: sm52rp.jpg]

Selesai? klik Connect

VOILA !! Backtrack 5 siap dipakai
Spoiler! :
[Image: 1z6cwsn.jpg]

Spoiler! :
[Image: xua6d.jpg]


Perhatikan gambar terakhir ini !!

Spoiler! :
[Image: 16kv1ac.jpg]


FYI:
Di forum xda dev ada beberapa android phone yg bisa contohnya:
Xperia X10, Motorola Atrix, HTC EVO, HTC Incredible, nokia N900, Samsung Galaxy S

Utk tablet contohnya:
Motorola Xoom, Galaxy Tab 7500

Note:
- Belum dicoba utk koneksi jaringannya
- Belum dicoba tiap aplikasinya
- Testing menyusul klo ane ada waktu ^_^"0">

UPDATE
- apt-get update bisa kalau menggunakan wireless, utk SIM card belum dicoba (info dari om Teeboo)


Semoga bermanfaat,
trixie


Sumber:
http://samhacked.blogspot.com/2011/10/in...alaxy.html
http://forum.xda-developers.com/archive/...39515.html

Tutorial Build Kernel Android

Tested on Galaxy Gio..

Tools that you need to build the kernel :

Quote:git
ARM Compiler Toolchain
Kernel Source Code

How to get kernel source code :

1. Download at support files below
2. Download from github
#. At your android, Open terminal and type:

Quote:git clone https://github.com/iksteen/android_kerne..._galaxygio

#. Now we need to make a repo, type:

Quote:mkdir ~/bin
PATH=~/bin:$PATH
curl https://dl-ssl.google.com/dl/googlesource/git-repo/repo > ~/bin/repo
chmod a+x ~/bin/repo
mkdir WORKING_DIRECTORY
cd WORKING_DIRECTORY
repo init -u https://android.googlesource.com/platform/manifest -b gingerbread

#. Give your name and email address, choose the color
#. Next, type:

Quote:repo sync -j32

and wait until it`s done to sync.

Make sure you already have all application that need before do the next steps.


Build custom kernel for samsung galaxy gio

1. still in terminal, type:

Quote:mkdir android
mkdir sources
mkdir .Galaxy_Gio_Sources

2. Hold ctrl+H on your home.
3. Move your kernel source code to folder that you created and name it .Galaxy_Gio_Sources
4. Copy paste ARM toolchain to source code folder
5. go to source code folder and open makefile
6. in makefile, find this:

Quote:#ARCH?= $(SUBARCH)
CROSS_COMPILE=

change to

Quote:#ARCH?= arm
CROSS_COMPILE= ./arm-2009q3/bin/arm-none-linux-gnueabi-

7. Back to terminal and type :

Quote:cd android
cd sources

8. next, type:

Quote:ln -s /home/*name of your desktop/.Galaxy_Gio_Sources/android_kernel_samsung_galaxygio

9. Additional note:
You can find config.gz file in your handphone with root explorer. it`s locate in proc/*config.gz. Copy those file to SDcard.
Move to /android/sources/android_kernel_samsung_galaxygio/kernel/

10. Type this command before compile

Quote:export CCOMPILER=~/arm-2009q3/bin/arm-none-linux-gnueabi-

or

Quote:export CCOMPILER=/home/*name of your desktop/arm-2009q3/bin/arm-none-linux-gnueabi-

11. next

Quote:make ARCH=arm CROSS_COMPILE=$CCOMPILER gio_rev03_defconfig

12. next

Quote:make ARCH=arm CROSS_COMPILE=$CCOMPILER

or directly w/o use export commands. Like these :

Quote:cd android
cd sources
cd android_kernel_samsung_galaxygio
chmod ugo+rwx bin

13. then

Quote:make menuconfig
make ARCH=arm CROSS_COMPILE=/home/delano/android/sources/android_kernel_samsung_galaxygio/arm-2009q3/bin/arm-none-linux-gnueabi- [Example}
or

Quote:make menuconfig
make ARCH=arm CROSS_COMPILE=/home/delano/android/sources/android_kernel_samsung_galaxygio/arm-2009q3/bin/arm-none-linux-gnueabi- -8[Example}

example of Compiling result

Quote:make menuconfig CHK include/linux/version.h
CHK include/generated/utsrelease.h
make[1]: `include/generated/mach-types.h’ is up to date.
CC kernel/bounds.s
GEN include/generated/bounds.h
CC arch/arm/kernel/asm-offsets.s
GEN include/generated/asm-offsets.h
CALL scripts/checksyscalls.sh
CC scripts/mod/empty.o
MKELF scripts/mod/elfconfig.h
HOSTCC scripts/mod/file2alias.o
HOSTCC scripts/mod/modpost.o
HOSTCC scripts/mod/sumversion.o
HOSTLD scripts/mod/modpost
CC init/main.o
CHK include/generated/compile.h
CC init/version.o
CC init/do_mounts.o
CC init/do_mounts_rd.o
CC init/do_mounts_initrd.o
LD init/mounts.o
CC init/initramfs.o
CC init/calibrate.o
LD init/built-in.o
AS usr/initramfs_data.o
LD usr/built-in.o
CC arch/arm/kernel/compat.o
CC arch/arm/kernel/elf.o
AS arch/arm/kernel/entry-armv.o
AS arch/arm/kernel/entry-common.o
CC arch/arm/kernel/irq.o
CC arch/arm/kernel/process.o
CC arch/arm/kernel/ptrace.o
CC arch/arm/kernel/return_address.o
CC arch/arm/kernel/setup.o
CC arch/arm/kernel/signal.o
CC arch/arm/kernel/sys_arm.o
CC arch/arm/kernel/stacktrace.o
CC arch/arm/kernel/time.o
CC arch/arm/kernel/traps.o
CC arch/arm/kernel/armksyms.o
CC arch/arm/kernel/module.o
CC arch/arm/kernel/sched_clock.o
CC arch/arm/kernel/sys_oabi-compat.o
CC arch/arm/kernel/pmu.o
CC arch/arm/kernel/perf_event.o
CC arch/arm/kernel/io.o
LD arch/arm/kernel/built-in.o
AS arch/arm/kernel/head.o
CC arch/arm/kernel/init_task.o
LDS arch/arm/kernel/vmlinux.lds
CC arch/arm/mm/dma-mapping.o
CC arch/arm/mm/extable.o
CC arch/arm/mm/fault.o
CC arch/arm/mm/init.o
CC arch/arm/mm/iomap.o
CC arch/arm/mm/fault-armv.o
CC arch/arm/mm/flush.o
CC arch/arm/mm/ioremap.o
CC arch/arm/mm/mmap.o
CC arch/arm/mm/pgd.o
CC arch/arm/mm/mmu.o
CC arch/arm/mm/vmregion.o
CC arch/arm/mm/proc-syms.o
CC arch/arm/mm/alignment.o
AS arch/arm/mm/abort-ev6.o
AS arch/arm/mm/pabort-v6.o
AS arch/arm/mm/cache-v6.o
CC arch/arm/mm/copypage-v6.o
CC arch/arm/mm/context.o
AS arch/arm/mm/tlb-v6.o
AS arch/arm/mm/proc-v6.o
CC arch/arm/mm/cache-l2x0.o
LD arch/arm/mm/built-in.o
CC arch/arm/common/clkdev.o
LD arch/arm/common/built-in.o
CC [M] arch/arm/common/cpaccess.o
CC arch/arm/mach-msm/io.o
CC arch/arm/mach-msm/dma.o
CC arch/arm/mach-msm/memory.o
CC arch/arm/mach-msm/clock.o
CC arch/arm/mach-msm/clock-voter.o
CC arch/arm/mach-msm/modem_notifier.o
CC arch/arm/mach-msm/cpufreq.o
CC arch/arm/mach-msm/nohlt.o
CC arch/arm/mach-msm/clock-debug.o
CC arch/arm/mach-msm/proc_comm.o
CC arch/arm/mach-msm/clock-pcom.o
CC arch/arm/mach-msm/internal_power_rail.o
CC arch/arm/mach-msm/vreg.o
CC arch/arm/mach-msm/mpp.o
CC arch/arm/mach-msm/pmic_debugfs.o
CC arch/arm/mach-msm/drop_caches.o
CC arch/arm/mach-msm/acpuclock.o
CC arch/arm/mach-msm/timer.o
CC arch/arm/mach-msm/irq-vic.o
AS arch/arm/mach-msm/idle-v6.o
CC arch/arm/mach-msm/smem_log.o
CC arch/arm/mach-msm/smd.o
CC arch/arm/mach-msm/smd_debug.o
CC arch/arm/mach-msm/remote_spinlock.o
CC arch/arm/mach-msm/socinfo.o
CC arch/arm/mach-msm/nand_partitions.o
CC arch/arm/mach-msm/pmic.o
CC arch/arm/mach-msm/rpc_hsusb.o
CC arch/arm/mach-msm/rpc_pmapp.o
CC arch/arm/mach-msm/rpc_fsusb.o
CC arch/arm/mach-msm/smd_tty.o
CC arch/arm/mach-msm/smd_qmi.o
CC arch/arm/mach-msm/smd_pkt.o
CC arch/arm/mach-msm/smd_nmea.o
CC arch/arm/mach-msm/smd_rpcrouter.o
CC arch/arm/mach-msm/smd_rpcrouter_device.o
CC arch/arm/mach-msm/smd_rpc_sym.o
CC arch/arm/mach-msm/smd_rpcrouter_servers.o
CC arch/arm/mach-msm/smd_rpcrouter_clients.o
CC arch/arm/mach-msm/smd_rpcrouter_xdr.o
CC arch/arm/mach-msm/rpcrouter_smd_xprt.o
CC arch/arm/mach-msm/ping_mdm_rpc_client.o
CC arch/arm/mach-msm/proc_comm_test.o
CC arch/arm/mach-msm/ping_apps_server.o
CC arch/arm/mach-msm/oem_rapi_client.o
CC arch/arm/mach-msm/rpc_server_dog_keepalive.o
CC arch/arm/mach-msm/rpc_server_time_remote.o
CC arch/arm/mach-msm/qdsp5/adsp.o
CC arch/arm/mach-msm/qdsp5/adsp_driver.o
CC arch/arm/mach-msm/qdsp5/adsp_info.o
CC arch/arm/mach-msm/qdsp5/adsp_rm.o
CC arch/arm/mach-msm/qdsp5/adsp_video_verify_cmd.o
CC arch/arm/mach-msm/qdsp5/adsp_videoenc_verify_cmd.o
CC arch/arm/mach-msm/qdsp5/adsp_jpeg_verify_cmd.o
CC arch/arm/mach-msm/qdsp5/adsp_jpeg_patch_event.o
CC arch/arm/mach-msm/qdsp5/adsp_vfe_verify_cmd.o
CC arch/arm/mach-msm/qdsp5/adsp_vfe_patch_event.o
CC arch/arm/mach-msm/qdsp5/adsp_lpm_verify_cmd.o
CC arch/arm/mach-msm/qdsp5/audio_out.o
CC arch/arm/mach-msm/qdsp5/audio_in.o
CC arch/arm/mach-msm/qdsp5/audio_mp3.o
CC arch/arm/mach-msm/qdsp5/audmgr.o
CC arch/arm/mach-msm/qdsp5/audpp.o
CC arch/arm/mach-msm/qdsp5/audrec.o
CC arch/arm/mach-msm/qdsp5/audio_evrc.o
CC arch/arm/mach-msm/qdsp5/audio_qcelp.o
CC arch/arm/mach-msm/qdsp5/audio_amrnb.o
CC arch/arm/mach-msm/qdsp5/audio_aac.o
CC arch/arm/mach-msm/qdsp5/audio_amrnb_in.o
CC arch/arm/mach-msm/qdsp5/audio_wma.o
CC arch/arm/mach-msm/qdsp5/audio_voicememo.o
CC arch/arm/mach-msm/qdsp5/audio_pcm.o
CC arch/arm/mach-msm/qdsp5/audio_amrwb.o
CC arch/arm/mach-msm/qdsp5/audio_wmapro.o
CC arch/arm/mach-msm/qdsp5/snd.o
CC arch/arm/mach-msm/qdsp5/snd_adie.o
LD arch/arm/mach-msm/qdsp5/built-in.o
CC arch/arm/mach-msm/pm2.o
etc

The result location from compiled kernel

Quote:arch/arm/boot/*zimage

source : http://mobilecon.info/building-samsung-g...ource.html

Install Backtrack di Smart Phone (Android)

This is a small tut on how to install BT on your anroid phones ..

1.So to install BT on anroid phones, 1st you need a rooted anroid phone.(By using Debdroid, we run Linux distros on ARMs...)

2. androidVNC

3.Backtrack 5 for ARM with Gnome downloaded and setup

4.Terminal Emulator

Launch the terminal emulator

Code:
cd /install location/BT5 (mostly it will be default location)
su
sh bootbt

Now your BT will be launched and you will be as local root.
Code:
ls pentest

Once you enter the pentest folder,enter the following cmd
Code:
export USER=root
vncpasswd

The default password of vnc is "toortoor '.And 'vncpasswd " is the password for the tightvncserver. Since we are connecting locally use' qwerty 'for the password
Once the configuration password for the VNC server up.

Code:
tightvncserver -geometry 1280x800

To start and stop VNC,you have to be in chroot

Code:
startvnc
stopvnc

[Image: noc7ph.jpg]

Once done you guyz are ready to rock and Pwn ;)

Hacking Linux With BackTrack 4 (1-33 Part)

Tehnik-Tehnik yang Dibahas:
Code:
    Episode 1 – Network Hacking – Arp Poisoning
    Episode 2 – Wireless Hacking – Cracking WEP
    Episode 3 – Wireless Hacking – DeAuth
    Episode 5 – Lock Picking – Bump Key
    Episode 6 – Phone Phreaking – Beige Box
    Episode 7 – Phone Phreaking/Network Hacking – Sniffing VOIP
    Episode 8 – Lock Picking – DIY Padlock Shims
    Episode 9 – Lock Picking – Mult-Disc Combo Locks
    Episode 10 – Hacking Basics – MD5
    Episode 11 – Website Hacking – Sql Injection
    Episode 12 – Hacking Basics – Backtrack
    Episode 13 – Website Hacking – XSS
    Episode 14 – Staying Secure – SSH Tunnel
    Episode 15 – Modding – Xbox Softmod
    Episode 16 – Wireless Hacking – Cracking WPA
    Episode 17 – Triple Boot – Windows, Backtrack, & Ubuntu
    Episode 18 – Local Password Cracking
    Episode 19 – Lock Picking Basics
    Episode 20 – Ettercap
    Episode 21 – XSS Tunnel
    Episode 22 – Playstation 2 Softmod
    Episode 23 – Cracking WEP Update
    Episode 24 – Bypass Hotspot’s Access Controls
    Underground – Install Backtrack 3 on USB
    Underground – CSRF(Cross Site Request Forgery)
    Underground – Alternate Data Streams
    Underground – Local File Inclusion
    Underground – Windows Privilege Escalation
    Underground – Bluetooth Hacking
    Underground – VMWare
    Underground – Fix Google Mail Enumerator
    Underground – Home Made Lock Picks
    Underground – Downfalls of Anti-Virus Software Part 2
    Underground – Downfalls of Anti-Virus Software
    Underground – Evilgrade
    Underground – Trojan Basics
    Underground – Manipulating Windows User Accounts
    Underground – Combine Files
    Underground – Password Phishing
    Underground – Windows SMB Relay Exploit
    Underground – Application Patching
    Underground – Metasploit Autopwn
    Underground – Email Spoofing
    Underground – Introduction
    Extracting Database Information from Information_Schema
    FPGA MD5 Cracker
    Arduino ARP Cop
    Email Injection
    Ping of Death
    DNS Spoofing with Virtual Hosts
    Bypass Cisco Clean Access & Cisco NAC Appliance
    Dual Boot – Windows & Backtrack
    Sql Injection Challenge How-to
    How to use Intel Pro/Wireless 3945ABG in Backtrack 2
    Local Privilege Escalation Vulnerability in Cisco VPN Client

Belum Ada Server Loaknya..
Langsung Saja
PHP Code:
http://uploading.com/files/get/32a25a8a/bt.DVD.part01.rar/
http://uploading.com/files/get/5ce7b8a1/bt.DVD.part02.rar/
http://uploading.com/files/get/e4ecf281/bt.DVD.part03.rar/
http://uploading.com/files/get/42df8m81/bt.DVD.part04.rar/
http://uploading.com/files/get/5eb64acb/bt.DVD.part05.rar/
http://uploading.com/files/get/9m28cmeb/bt.DVD.part06.rar/
http://uploading.com/files/get/e6b42f4d/bt.DVD.part07.rar/
http://uploading.com/files/get/8656e4f9/bt.DVD.part08.rar/
http://uploading.com/files/get/d1a43666/bt.DVD.part09.rar/
http://uploading.com/files/get/7ef95m26/bt.DVD.part10.rar/
http://uploading.com/files/get/723dbm96/bt.DVD.part11.rar/
http://uploading.com/files/get/217fb853/bt.DVD.part12.rar/
http://uploading.com/files/get/992b4225/bt.DVD.part13.rar/
http://uploading.com/files/get/3b4m62fd/bt.DVD.part14.rar/
http://uploading.com/files/get/86f47ae9/bt.DVD.part15.rar/
http://uploading.com/files/get/48ed93e9/bt.DVD.part16.rar/
http://uploading.com/files/get/93fa662f/bt.DVD.part17.rar/
http://uploading.com/files/get/b1bbb5ea/bt.DVD.part18.rar/
http://uploading.com/files/get/efb8mdb3/bt.DVD.part19.rar/
http://uploading.com/files/get/1134me5f/bt.DVD.part20.rar/
http://uploading.com/files/get/bc8be5a2/bt.DVD.part21.rar/
http://uploading.com/files/get/b86mfm4a/bt.DVD.part22.rar/
http://uploading.com/files/get/399fcfde/bt.DVD.part23.rar/
http://uploading.com/files/get/522m7619/bt.DVD.part24.rar/
http://uploading.com/files/get/899ba3ma/bt.DVD.part25.rar/
http://uploading.com/files/get/e1785712/bt.DVD.part26.rar/
http://uploading.com/files/get/e8m16a3d/bt.DVD.part27.rar/
http://uploading.com/files/get/2b799642/bt.DVD.part28.rar/
http://uploading.com/files/get/mdce2c79/bt.DVD.part29.rar/
http://uploading.com/files/get/433d1mcd/bt.DVD.part30.rar/
http://uploading.com/files/get/mef46mc9/bt.DVD.part31.rar/
http://uploading.com/files/get/1ae6emd7/bt.DVD.part32.rar/
http://uploading.com/files/get/992dab3m/bt.DVD.part33.rar/ 
Semoga Bermanfaat
 

I'M A LAMER DON'T TROLL ME mas[TER] Copyright © 2013 | Powered by rifsivk yum